As a designer, you are the ‘artist’ for the client’s course.
Whether you are creating a storyboard for a soft skills course or software application, it is important to 1) create a document for the course that easily tells a story with text and imagery. And 2) create a document that all project team members can work from. This includes voice talents, graphic designers, and developers.
Keep reading to learn how to lay out an eLearning Storyboard
You also want to create a document in a tool that allows for Track Changes, such as MS Word.
I have various templates I have created over the years using tables within MS Word.
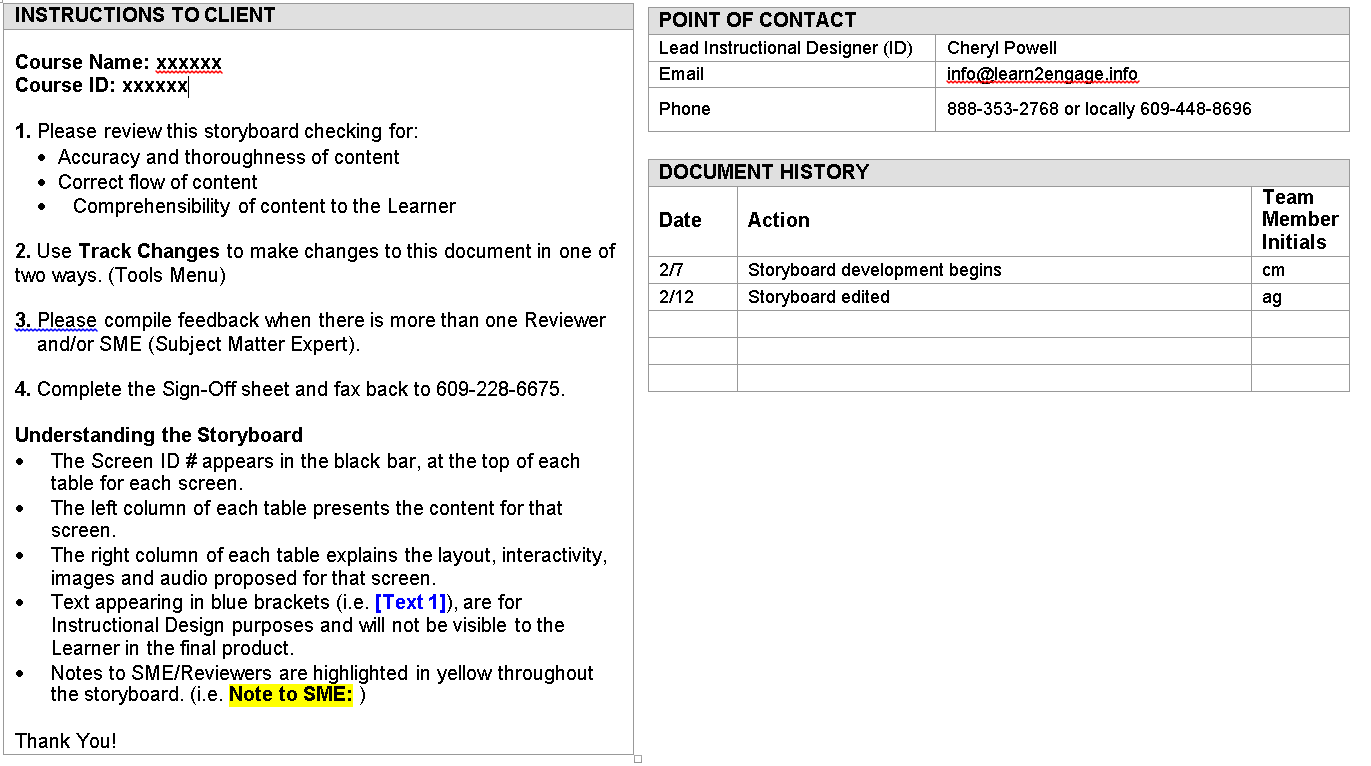
On page one, I ensure a log is maintained that describes the course, any custom client tracking or ID numbers, the main point of contact for the design, and who edited the document last. A sample is below.

Next, let’s review what should be included in the main table of the storyboard. The key is to create a table for EACH slide within the course. In my storyboards, I include the following items:
- Topic/subtopic headers matching the outline from the Design Document.
- On-screen text for each slide.
- Brief description for each slide.
- Audio narration text for each slide.
- Graphic image or descriptions depending on the Storyboard layout/template.
- Programmer instructions for interactions and activities, graphic descriptions, and/or animation cues.
- Assessment descriptions, questions, feedback and answers.
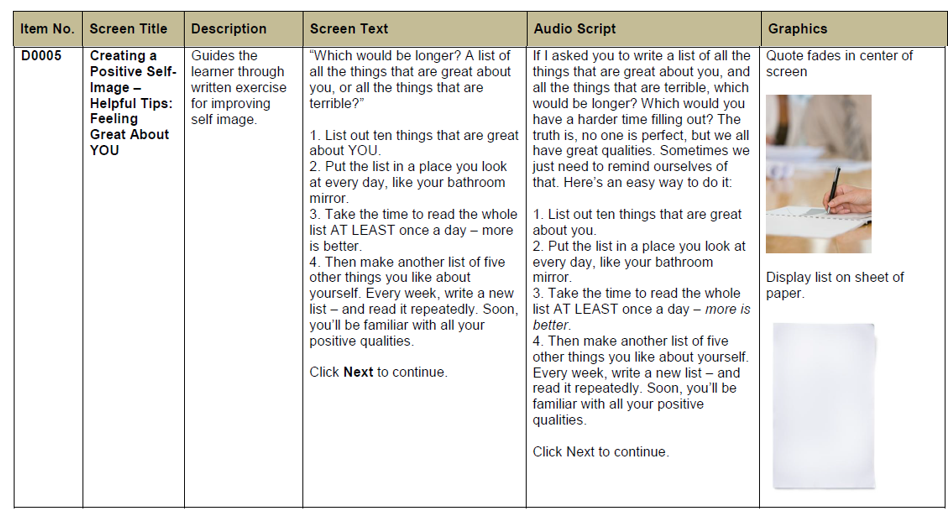
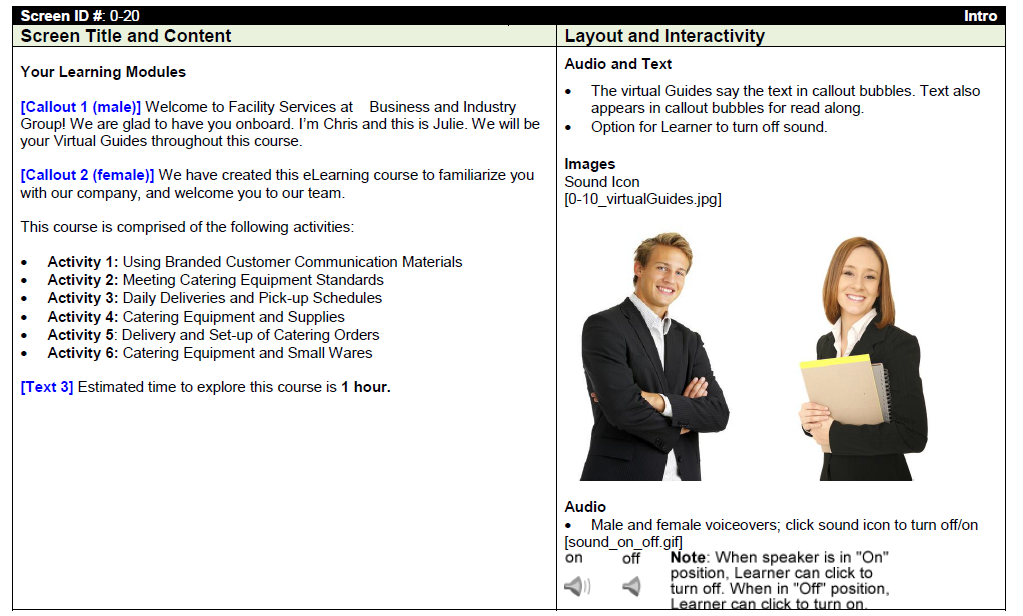
Here is a sample of what that would look like in a couple of different table layout formats.


Once the client has included all of their track changes and you have provided the ‘agreed’ number of revisions to finalize the document, this document can be sent to voice talents, graphic designers, and developers to begin work!
Each team member can use the storyboard slide-ID number for each slide, for example, the A0005 displayed below, as the filename for their audio and image files, which makes it super easy for the developer to implement into each slide.

Hopefully this How To series on laying out an eLearning storyboard was helpful!
Until next time…
About the Author
Cheryl Powell, CEO of GC Learning Services LLC dba Learn2Engage, is in her 22nd year as a Virtual Instructional Design and e-Learning Specialist, with clients all over the US and overseas. Additionally, she is a published author of various works of fiction and motivational speaker.
Her industry experience industry experience is vast, and includes Telecommunications, Finance (Mortgage, Banking and Credit industry), Sales, Pharmaceutical, Media, Software Development, Healthcare, Food and Beverage, and many more.
She holds a Bachelor in Business Management, a graduate certification in Project Management, and a Master of Science degree in IT Project Management. She has studied the Adult Learning principles of experts and theorists such as Gagne’s (nine events), Maslow’s (hierarchy of needs), and Dr. Ruth Clark, to ensure her courses, presentations, storyboards and modules, engage the learner, utilize the proper balance of white space, text and graphics, and result in high Learner Retention rates.
Her clients return year after year for the affordable pricing, her rapid customer response rate, and the benefits they observe in the productivity of their employees after taking her courses.


Comments are closed.